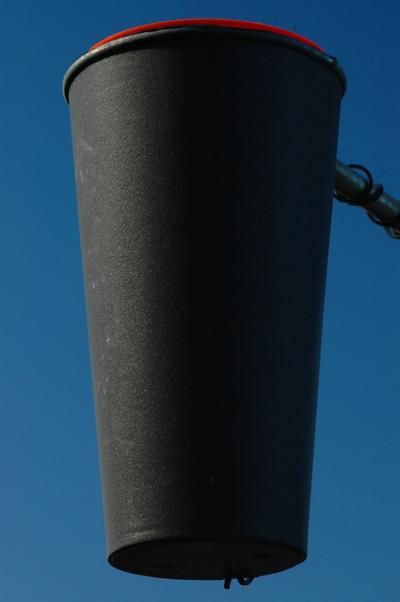
[Norsk]

About the precipitation gauge

The precipitation gauge
The final result.

Some problems with a La Crosse rain gauge arose after a few months' use. It was vulnerable to spiders, which consider this box a perfect nesting place, and web quickly prevents the bucket from tipping as is should. It also has a prettly small inlet, which makes it inaccurate in windy conditions. Besides, it fails to detect very light rain or drizzle. So I decided to build a new gauge. To make it work in winter as well, some kind of heating device was necessary. Experiments last winter with the La Crosse gauge had shown me that some resistance wire and insulation work reasonably well.

The following parts were used:

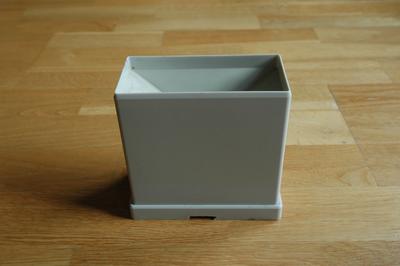
  • One La Crosse WS-7048U rain gauge (modified for 1-wire).
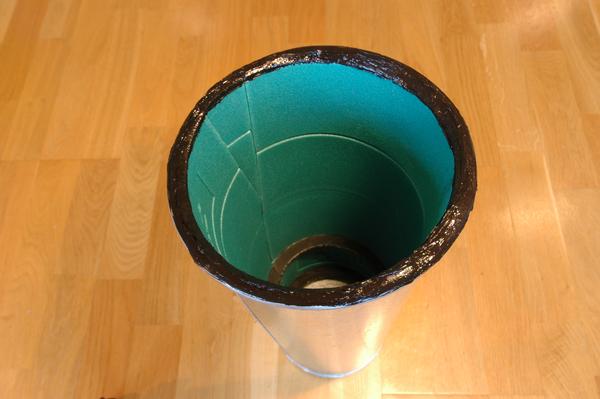
  • One large metal flower bucket from Ikea (upper diameter: 22cm, lower: 15cm, height 40cm).
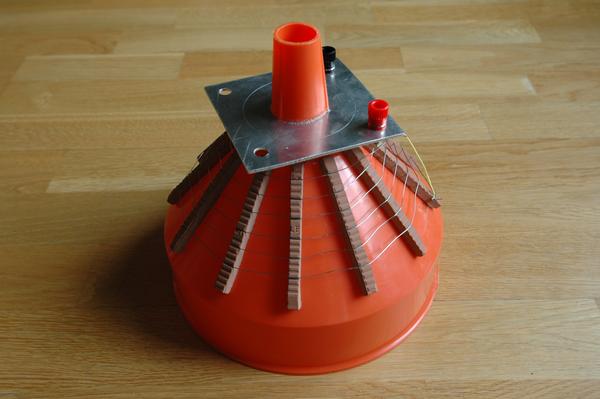
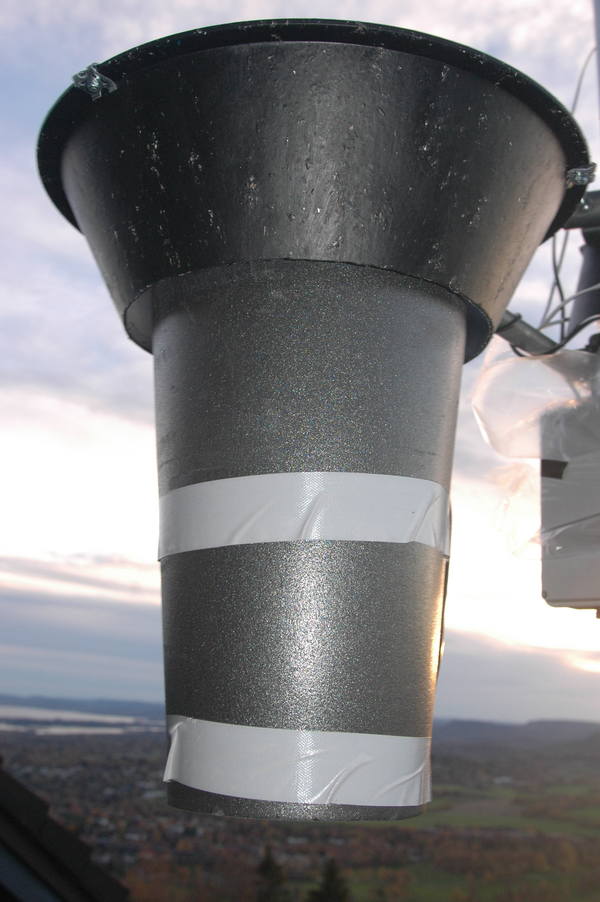
  • One petrol funnel with a 20cm diameter and with a (spider proof?) mesh.
  • Two Ajungilak seat pads and about two square metres of parquet underlay.
  • 10 metres of resistance wire, 6.94 ohm/m.
  • A couple of ceramic tiles.
  • Some silicone bathroom seal.
  • Some bits of plastic and aluminium sheets.
  • Connectors, wires, etc.

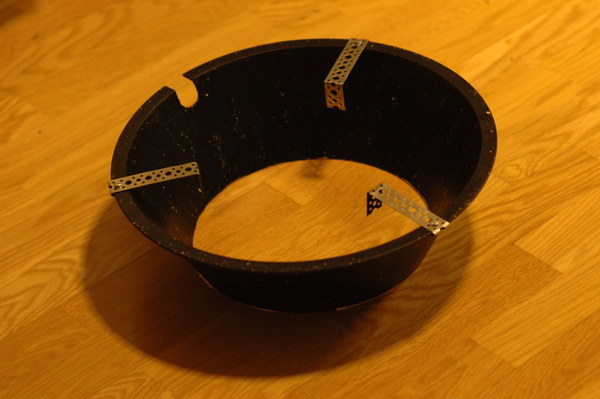
I cut the seat pads so they would cover all of the inside of the bucket, and glued it. The bucket now had some basic insulation, and because of the conical shape of the bucket and the soft insulation, all parts could be made to fit and be firmly spueezed into place. I pasted some silicone seal around the upper end of the bucket as water proofing (picture 1). Some holes were made in the bottom for water to escape and wires.

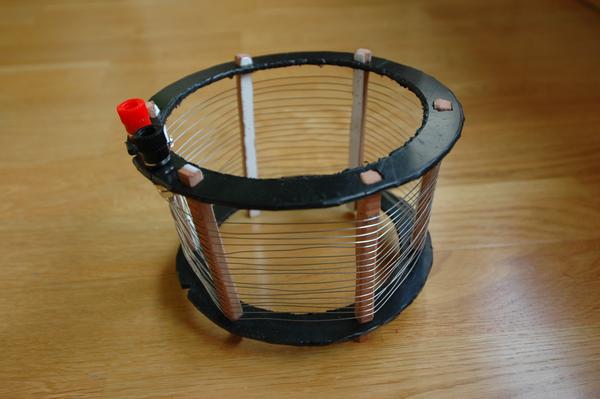
A heating device in the bottom of the bucket prevents water inside the La Crosse gauge from freezing. A few metres of resistance wire producing 5 - 15W of heat should suffice. I made two plastic rings, their diameters being 14 and 15.5cm, which would fit the lower 10 cm of the bucket. Between which I placed ceramic rods 60 degrees apart around which the wire could be winded, so it wouldn't touch the insulation (picture 2). I used a little more than 6 metres of wire, divided in two equally long parallel runs lowering the resistance. This yields about 7W at 9V and 13W at 12V.

The heat will rise in the bucket, but be somewhat too weak to melt snow falling heavily into the funnel. Therefore, I also added wires underneath the funnel, much the same way as in the bottom of the bucket, using ceramic tiles to protect the plastic funnel from the hot wires (picture 3). I used a little more than 3 metres, which as well was divided in two equally long parallel runs. This yields about 15W at 9V and 27W at 12V. At 27W the wire noticeably heats the plastic of the funnel, while at 15W it still feels cold. However, 15W (9V) is sufficient in ordinary winter conditions (around -5 °C), since snow falling in the funnel will insulate enough to melt it. And 7W (9V) in the bottom of the bucket is sufficient to keep the water liquid if the bucket is insulated properly. A total of 24W (or less) should do in most conditions. It's important not to use too much heat as it will make some of the collected water evaporate before it gets counted. However, to be sure to have sufficient heat, I use a power adaptor with changeable current capable of up to 70W.

It turned out that the seat pads didn't insulate very well, so I added more insulation whereever there was room for it inside the bucket. I used a parquet underlay (with excellent insulation properties) that comes in 3mm sheets. I also covered the outside of the bucket with these sheets.

I also put a temperature sensor inside the bucket, so I can monitor the heat, and regulate it automatically. I do this by means of a switched power outlet which can be controlled by USB (the Gembird SIS-PM). I've also added a wind shield.

La Crosse
The original rain gauge, which was put between the heating device and the funnel.

If the heater remains on all the time, the gauge will report too little snow. This probably demonstrates that if the snow flakes are melted once they touch the funnel, they will partly evaporate before the droplets grow big enough to flow into the bucket. I let the heater work by the following rules: The heater goes on if the temperature drops below +1 °C, and it it gets switched off when the temperature goes above +9 °C (which ensures that any snow has begun to melt) and nothing has melted during the past 5 minutes, but the heater will be on only for a maximum of two hours straight. When the heater has been switched off, the temperature has to drop below +1 °C again before a new cycle can start. These rules cause a layer of snow to form in the funnel before melting begins, and the heater is switched off once the layer is gone. The snow cover prevents evaporation and it insulates making the heater more effective. The downside is that snowfall may be reported a few hours late.

Some pictures

Bucket
Picture 1. The design started with a flower bucket.

Heating device
Picture 2. About 2x3 metres of resistance wire (6.94 ohm/m) in two parallel runs.

Funnel
Picture 3. A petrol funnel with 2x1.5 metres of resistance wire (6.94 ohm/m) in two parallel runs. The ceramic rods were cut from tiles.

Wind shield
Picture 4. Wind shield.

Wind shield
Bilde 5. Gauge with wind shield.


Send an e-mail to steinar@latinitas.org (Steinar Midtskogen) if you have any inquiries about this page.